
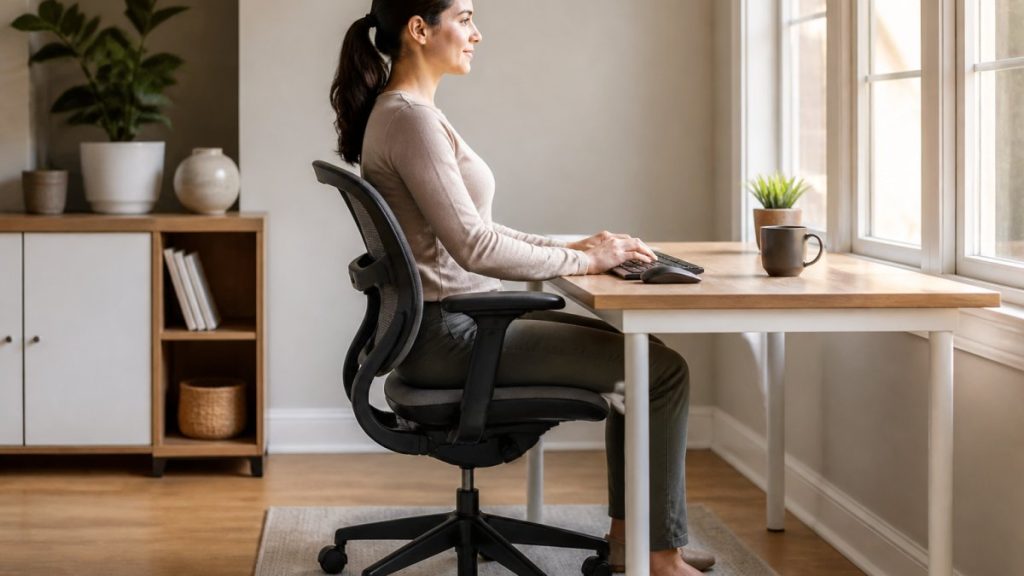
Table of Contents
- Why Proper Desk Posture Matters More Than You Think
- Step 1: How to Adjust an Office Chair for Your Body
- Step 2: Build an Ergonomic Desk Setup Around Your Chair
- Step 3: Apply the 90-90-90 Sitting Rule
- Step 4: Position Your Feet, Legs, and Lower Back
- Step 5: Use Desk Posture Stretches and Movement Breaks
- Step 6: Adapt Your Setup for Laptop-Only and Small-Space Work
- Troubleshooting Discomfort: When to Seek Help
- Frequently Asked Questions
Last Updated: October 21, 2026
Why Proper Desk Posture Matters More Than You Think
Learning how to sit at a desk properly is one of the simplest ways to protect your back, neck, and energy levels during long workdays.
Here is the core idea that runs through this whole guide: there is no single perfect posture. Bodies vary, desks vary, and the best setup is one you can adjust and shift out of throughout the day.
Below, we walk through seven steps, from chair setup to movement breaks. We also cover laptop-only setups and what to do when discomfort lingers.
Step 1: How to Adjust an Office Chair for Your Body
The best office chair setup starts with height, then depth, then the backrest. Get those three right and most of the rest falls into place.
Setting Seat Height, Depth, and Backrest
- Set seat height first. Raise or lower the seat until your feet rest flat and your knees sit level with your hips.
- Adjust seat depth. You should fit two to three fingers of space behind your knees. Slide the seat in or out until it feels right.
- Set the backrest. Move it so the curve supports your lower back, not your mid-back.
- Set armrests last. They should let your elbows rest close to your body with relaxed shoulders.
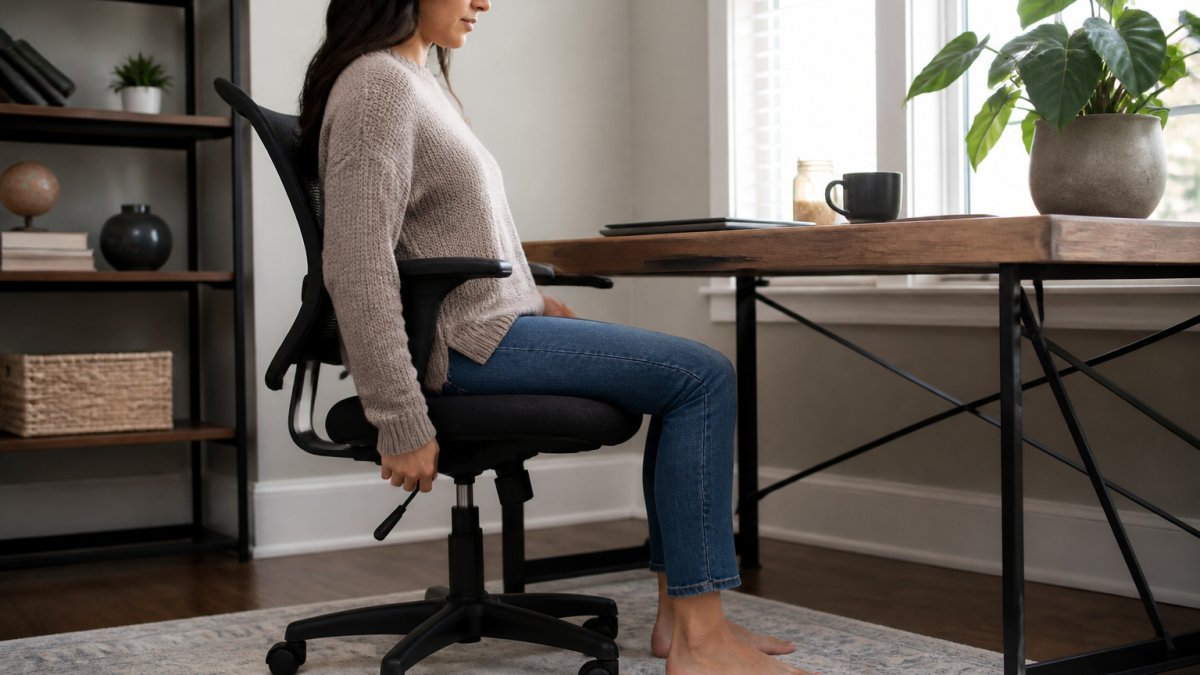
If your feet dangle after setting the height, add a footrest. That is a common fix, not a sign you bought the wrong chair.
Set the chair height before anything else. Most people adjust their desk first and then fight the chair all day. Chair first, desk second.
Step 2: Build an Ergonomic Desk Setup Around Your Chair
An ergonomic desk setup is built around your chair, not the other way around. Once the chair fits, bring the desk, keyboard, and screen to you.
Keyboard, Mouse, and Monitor Placement
- Desk height: your forearms should rest parallel to the floor, elbows near a 90-degree angle.
- Keyboard: close enough that your elbows stay close to the body and your wrists stay neutral.
- Mouse: right beside the keyboard so you are not reaching out to the side.
Keep your shoulders relaxed. If they creep up toward your ears, your keyboard is probably too high.
Step 3: Apply the 90-90-90 Sitting Rule
The 90-90-90 sitting rule is a simple checkpoint: hips, knees, and ankles each near a 90-degree angle. It gives you a quick way to check your sitting posture without overthinking it. But it is worth understanding what the rule is and is not, because treating it as a rigid law is one of the most common ways people make their desks less comfortable.
What the rule actually checks
Here is how to run the check:
- Hips: thighs roughly level, not sloping down toward the knees.
- Knees: bent near 90 degrees, with feet flat.
- Ankles: feet planted, not tucked under the chair or wrapped around the base.
The logic behind it is mechanical, not mystical. A near-90-degree hip angle keeps your thighs roughly parallel to the floor, which lets your pelvis sit in a neutral position instead of tucking under or tipping forward. Level knees keep the backs of your thighs from pressing into the seat edge. Flat feet give you a stable base so your lower back does not have to work to balance you.
Why the angles are guidelines, not a single ideal
Ergonomics guidance from regulators such as the Occupational Safety and Health Administration on computer workstation ergonomics describes ranges and neutral joint positions rather than one exact pose. A 90-degree hip angle is a reasonable midpoint, but it is not a universal target. A few reasons the numbers move:
- Body proportions vary. A person with a long torso and short legs will set seat height differently from someone with the opposite build, even at the same overall height.
- Hip anatomy varies. Some people find a slightly open hip angle, thighs sloping gently down toward the knees, far more comfortable than a strict 90 degrees, especially if they have tight hip flexors from sitting a lot.
- Chair geometry varies. Seat pan tilt, backrest angle, and cushion firmness all change where “90 degrees” actually lands. A deeply contoured seat can make a true 90-degree knee angle feel like you are sliding forward.
A practical way to use the rule: set it as your baseline, sit for a few minutes, then notice where you feel pressure. If your thighs go numb, the seat edge is too high or too deep. If your lower back aches, your pelvis may be tucked and your seat height or backrest needs adjusting. If your feet keep sliding forward, your seat is probably too high.
How to personalize the checkpoint
Use the 90-90-90 rule as a reset, not a permanent pose:
- If you are taller than average: raise the seat until your knees are level, then add a footrest only if your feet still dangle. You may need a desk riser or a taller desk to keep your forearms parallel to the floor.
- If you are shorter than average: lower the seat until your feet are flat, then check whether the desk is now too high. A keyboard tray or a lower desk surface is often the fix, not a higher chair.
- If you have back or hip discomfort: try a slightly reclined backrest, around 100 to 110 degrees from the thighs is a common comfortable range, and let the hip angle open a little. The goal is a neutral spine you can hold, not a measured angle you have to keep checking.
Crossing your legs for hours shifts weight onto one hip and can strain the lower back. If you catch yourself doing it all day, that is a sign to reset your seat height or add a footrest.
The 90-90-90 rule is a starting checkpoint, not a law. Set it, feel where pressure builds, and adjust the angles to your own body, then change position before the pose goes stale.
Step 4: Position Your Feet, Legs, and Lower Back
Feet flat on the floor, knees level with hips, and a supported lower back form the base of good sitting posture. Get these right and the upper body tends to follow.
A few practical points:
Start your wellness journey today! →
- Feet: flat and grounded. Use a footrest if they do not reach.
- Legs: leave space behind the knees so the seat edge does not press into them.
- Lower back: let the backrest’s lumbar curve fill the gap above your beltline. A small cushion works if the chair lacks support.
Spinal alignment matters, but so does comfort. A neutral spine you can hold for an hour beats a “perfect” posture you abandon in ten minutes.
Step 5: Use Desk Posture Stretches and Movement Breaks
Desk posture stretches and regular movement breaks matter as much as your setup. Prolonged sitting in any position, even a good one, loads the same tissues.
Try this simple routine every 30 to 45 minutes:
- Stand and walk for one to two minutes.
- Shoulder rolls: five slow rolls back, then forward.
- Chest opener: clasp hands behind your back and gently lift.
Changing position is the point. Shift from sitting to standing, recline slightly, then return. Movement keeps joints and muscles from stiffening.
The best posture is a moving one. No single seated position is meant to last all day, so build small position changes into your routine.
Step 6: Adapt Your Setup for Laptop-Only and Small-Space Work
A laptop-only setup can still support good desk ergonomics with two cheap additions: a stand and an external keyboard. The screen and the keyboard fight each other on a laptop, so split them apart. That single move, raising the screen while lowering your hands, fixes more laptop-related neck and wrist strain than any other adjustment.
The laptop problem, in plain terms
On a laptop, the screen and keyboard are attached. If you raise the screen to eye level, the keyboard rises with it and your shoulders creep up. If you lower the keyboard to a relaxed height, you end up looking down at the screen and craning your neck. You cannot solve both with one piece of hardware, which is why the stand-plus-external-keyboard combination is the standard fix.
A measurable screen-distance and eye-comfort guide
Screen height gets most of the attention, but viewing distance and glare matter just as much for eye comfort over a long day. Use these checkpoints:
- Distance: sit about an arm’s length from the screen, roughly 20 to 30 inches for most people. If you find yourself leaning in, the text is probably too small; increase font size rather than moving closer.
- Height: the top of the screen should sit at or slightly below eye level, so your gaze drops a little when you read the middle of the screen. On a laptop stand, that usually means the stand lifts the screen several inches above the desk.
- Glare: position the screen so windows and overhead lights are not directly behind it or reflecting off it. If you can see a bright reflection of a window in the screen, you will unconsciously shift your posture to avoid it.
Low-cost fixes for small spaces
You do not need a dedicated office to apply this. For small spaces and tight budgets:
- Raise the laptop on a stand, a stack of books, or a sturdy box so the screen sits near eye level. A stand is nicer, but the principle is what matters.
- Add an external keyboard and mouse so your hands stay low and relaxed. A compact keyboard takes little desk space and is often the single best purchase for a laptop-only worker.
- Use a compact footrest if your chair is tall for the desk, or a firm cushion under your feet if the chair is short.
Rotating between setups
If you work from a couch or kitchen counter sometimes, that is fine. Just do not stay there for hours. Rotate between setups and reset your posture each time you move. A lap desk on the couch, a stand on the kitchen counter, and a proper chair at the desk can all coexist, the key is that no single constrained setup becomes your whole day.
Before buying anything, test the fix. Stack books under the laptop to see whether a stand would help, and try a cheap external keyboard to confirm the height difference matters to you. Most people find the keyboard is the bigger win.
Troubleshooting Discomfort: When to Seek Help
Most desk-related discomfort eases when you fix your setup and move more. Some signals mean it is time to get a professional opinion.
Watch for these signs:
- Pain that wakes you at night or lasts past a few days
- Numbness, tingling, or weakness in the arms or hands
- Headaches that build through the workday
If discomfort keeps returning after you have adjusted your chair, desk, and screen, the cause may sit deeper than your setup. We combine chiropractic care, massage therapy, functional medicine, and yoga to find what is driving the tension. You can read general guidance from the Occupational Safety and Health Administration on computer workstation ergonomics and the Mayo Clinic’s overview of back pain for background.
Frequently Asked Questions
What is the 90-90-90 rule for sitting?
The 90-90-90 sitting rule means your hips, knees, and ankles each sit at roughly a 90-degree angle while you work. Adjust your chair height until your knees are level with your hips, keep your feet flat on the floor, and set your seat depth so your back stays supported without pressure behind the knees. This baseline keeps your spine stacked and reduces strain on the lower back and legs during prolonged sitting.
How high should my chair be when sitting at a desk?
Set your chair so your feet rest flat on the floor and your knees are level with your hips, roughly a 90-degree knee angle. If your desk is too high after that adjustment, raise the chair and add a footrest so your legs stay supported. The goal is a neutral spine with relaxed shoulders and forearms parallel to the floor, not a specific number of inches.
How often should you take breaks from sitting at a desk?
Stand up and move at least once every 30 to 60 minutes, even if only for a minute or two. Short, frequent movement breaks beat one long break because they interrupt prolonged sitting before stiffness sets in. Pair each break with a simple desk posture stretch, like a chest opener or a gentle neck roll, and use a timer if you tend to lose track of time during focused work.
Why am I so uncomfortable sitting at a desk even with a good chair?
Discomfort usually comes from a mismatch between your chair, desk, and screen rather than the chair alone. Check that your feet are flat, your elbows stay close to your body, and your monitor sits at eye level so you are not craning your neck. If pain persists despite an ergonomic desk setup, a professional evaluation can help identify underlying causes such as muscle tension or spinal alignment issues.
Desk discomfort rarely fixes itself, and guessing at the cause can waste months. If posture changes and movement breaks are not enough, Holistic & Wellness Medicine can help you find the root cause. Our integrated team pairs chiropractic care with massage therapy, functional medicine, and yoga, so your care addresses the whole body instead of one symptom. Start your wellness journey today and build a setup, and a body, that holds up over the long run.





[…] a full walkthrough, see our step-by-step guide on how to sit at a desk properly. And remember that setup only goes so far: our guide to exercises for upper back strength covers […]